
CRYSTAL RIVER, Fla. – When field cut lumber, recently converted from timber, finally reached the 18th century cabinetmaker’s shop, his main tasks were to cut and shape the wood to his own design and to smooth the surface. He and his journeymen and apprentices accomplished these tasks with an amazingly small array of hand tools, some of which would be familiar to us today and some that many of us would have no idea how to employ.
Some of these tools, and the techniques used in conjunction with them, left marks in the wood that allow us to catch a glimpse of the action, frozen in time for our inspection.
SAWS – Virtually all cutting of lumber was done with a handsaw, introduced in the Bronze Age, used by the Romans who recognized the benefit of offsetting the teeth and perfected in the 18th century. The saw utilized in the initial shaping and cutting of rough lumber was the panel saw, developed by the Dutch in the 17th century. This saw is what we think of today when we think of a handsaw. It has a long tapered, stout but flexible blade and a pistol grip handle. It was used to rip and crosscut larger pieces. Other saws used were the bow saw, the keyhole saw and the “backed” or “back” saw as they are known today. These saws had a brass or steel spline on the top of the thin blade to stiffen it and allow precision cutting such as was required for dovetails.
Handsaw marks are relatively rare since sawn surfaces are usually either further dressed or concealed within a joint. The best place to look for them is on the bottom of chair legs, which are carved rather than turned and on the inward facing surfaces of carved legs. The most common saw mark is the thin overcut left on a dovetail joint.
PLANES – The next most common tool used in shaping and sizing lumber was the plane. This too was used by the Romans and probably has the greatest variety and assortment of any of the major hand tools.
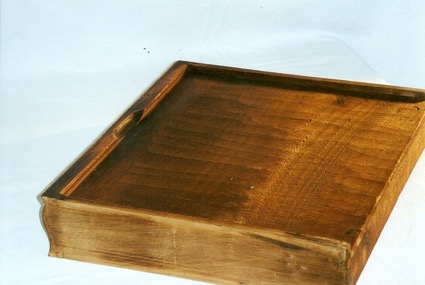
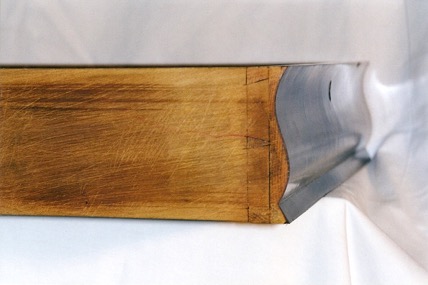
The workhorse of the plane family is the “jack” plane or the “fore” plane. This heavy, wooden bodied tool had a slightly convex blade and was used to reduce the thickness of a panel of wood. It was worked with the grain in long straight strokes, reducing the thickness more or less uniformly across the panel. While the blade was kept sharp and was worked with the grain, using a jack plane was hard work, often relegated to the lowest rank in the shop. This tool leaves perhaps the most obvious and identifiable mark of any of the tools in use.
Since the drawer bottoms and back panels were never expected to be seen, no effort was made to smooth out the marks of the plane. We can find the long shallow gouges of the jack plane on most drawer bottoms and back panels of the 18th and early 19th centuries. Fingertips run lightly across the grain will detect the rise and fall of the furrows. A raking light or a light behind a straight edge will show the marks to the naked eye, often revealing the wandering pattern of the tired apprentice.
Other types of planes were used to create the multiple cuts required on moldings. Sometimes a quick sighting down the length of a piece of molding or reeding will highlight the slight variations caused by the hand-operated plane. Yet another kind of plane was used to create rabbets, or rebates, and grooves. The “toothing” plane with a comb-like blade was used to reduce the thickness of small hard surfaces and to scratch out tiny parallel channels in the surface of a piece of wood to prepare it to receive a sheet of veneer. A peek under the loose veneer of a period piece will often show the results of the toothing plane.
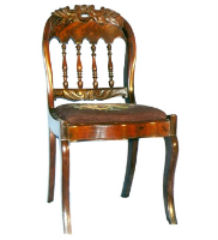
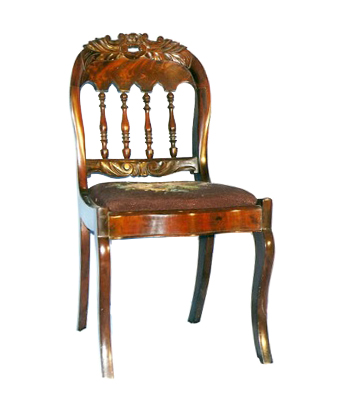
LATHES – Early foot-powered lathes had a low rotation speed compared to modern machinery. As a result not all the wood was removed evenly. Softer new growth may have been cut more deeply than older growth, leaving a vertical ribbed feeling along a turned piece. Slower rotation also accounts for the occasional presence of visible spirals in deep cuts where the craftsman did not take the time later to smooth out his work. These spirals were caused by the turning gouge moving horizontally as the piece was spun.
A key to the detection of the use of a foot-powered lathe is the inconsistency in the length and depth of individual elements and cuts. Since most turners of the 17th and18th centuries worked by the faster method of measuring by eye rather than by stopping the work and using calipers and a rule, variations in “identical “ turnings on the same piece can be spotted by careful measurement. Because we expect to see identical turnings we often do not detect the minor variations without measuring, thus missing a valuable clue.
One last clue about old lathes is the mark that is not left. Foot-powered lathes did not leave the four radiating lines around the center hole in the end of a turned piece. This is a modern lathe adaptation. Old lathes left a single shallow round hole.
DRILL BITS – Most (but not all) 18th and early19th century cabinetmakers used a round ended bit, called a spoon bit or pod auger, to drill the round mortise required for turned chair stretchers and legs. The resulting hole is rounded on the bottom and can be detected with a finger or a flashlight. However some flat-bottomed bits were in use at that time. They were known as center bits or brad point bits. They left a flat hole with a conical indentation at the bottom. The evidence of small screw-like threads in the shallow indentation speaks of the modern gimlet bit, also known as a Scottish bit, which has threads on the point. This type of bit was introduced early in the 19th century and came into general use around mid century.
CHISELS – Chisel marks are elusive except on normally unseen surfaces such as under chair seats and behind carved knees. Since the chisels used by period craftsmen were kept extremely sharp, most often no further dressing of the wood was required after a chisel cut. A finger run under a carved crest rail or behind a cabriole knee will encounter the sharp, undressed edges of chisel cuts.
Surface carvings provide the best site for chisel marks. By looking against a light across an acanthus carved knee or crest rail cartouche it is often possible to see individual chisel stokes as the carver worked his pattern. Period smoothing techniques, prior to the invention of sandpaper, did not remove these marks though they may have mellowed over the years through wear and the removal and reapplication of finishes.
Another more mundane chisel mark was used to record the identity of a chair within a set or a drawer within a case. Roman numerals, which require only straight lines, were often used to number and identify pieces and were inscribed with small chisels.
MARKING DEVICES – Every woodworker has to mark his work as he goes, indicating cut lines, joinery, measurements etc. Cabinetmakers used three main markers, the awl or scratch awl, the marking gauge and the newly developed writing instrument of the late 1700s, the wood encased pencil.
Awls may have been as simple as a sharpened piece of iron driven into a stick or an elaborately manufactured marker made of steel. In any event its primary purpose was to mark the location of a cut and as such, most awl marks disappeared beneath the saw blade. Most of the marks that we can see today and may ascribe to an awl were actually made by a marking gauge, a point mounted on a measuring device that could consistently mark out the prescribed depth of dovetail cuts, as is often seen on drawer sides, or mark the precise spot of a mortise to be chiseled out on a chair leg or case frame.
The most exciting mark to find is the pencil mark. It may be just more Roman numerals but sometimes it is a series of measurements or even notes, meant to remind the craftsman of something in particular. And of course the ultimate mark is the signature, often done with a flourish on the drawer bottom or back. That’s about as personal a mark as we will ever find.
___
By FRED TAYLOR
Send comments, questions and pictures to Fred Taylor at P.O. Box 215, Crystal River, FL 34423 or email them to him at info@furnituredetective.com. Visit Fred’s newly redesigned website at www.furnituredetective.com and check out the new downloadable “Common Sense Antiques” columns in .pdf format.
His book “How To Be a Furniture Detective” is available for $18.95 plus $3 shipping. Send check or money order for $21.95 to Fred Taylor, P.O. Box 215, Crystal River, FL 34423.
Fred and Gail Taylor’s DVD, “Identification of Older & Antique Furniture” ($17 + $3 S&H) is also available at the same address. For more information call 800-387-6377 (9 a.m.-4 p.m. Eastern, M-F only), fax 352-563-2916, or info@furnituredetective.com. All items are also available directly from his website.
